This was the view from my bedroom window in the morning.

Out of the patio doors from the room where I have my crafting desk.

Amy showing how deep the snow is.


This was the view from my bedroom window in the morning.
Out of the patio doors from the room where I have my crafting desk.
Amy showing how deep the snow is.

This is a card I made a little while back, but was unable to photograph until the other day. It uses different colours of Doodlebug polka dotted paper, punched using an EK success punch. A little shaping with an embossing stylus to curve the petals, and then a circle of polka dot paper and a clear gem for the centres. The card is a lined texture, and I drew a rough curve on the black polka dotted paper before cutting out and sticking onto the base card. The sentiment is from my stash, stamped in black on a die cut oval which I ran the brush tip of a black marker around to give a bit of a frame.

This is the final one of the cards from the class last Wednesday. It's the one we did in the morning, and all the flowers are made from punched snowflakes. The bauble is cut from Bazzill using a circle die, and then stamped with a flourish stamp using Versamark and heat embossed with gold powder. A little bit of sponging in brown around the edges to give a bit of dimension. The top 'hanger' part of the bauble is a circle punched out of gold card - I did trim the bottom of it using a fancy border punch, and was quite pleased with how it looked - but then ended up covering it with the flowers! The fern leaf is a Leone Em punch. The centres of the flowers are either red or gold Stickles, or gold liquid pearls.
We had a bit of extra time, so made a tag to match.


This is another card from my class at the Glitter Pot last week. It uses a different butterfly from the same Hero Arts set, which has been coloured using markers scribbled onto a tile, and the colour picked up with a water brush. I then added some extra black lines and dots with the fine point of a marker, and some lilac gems. The photo doesn't show it very well, but the butterfly has been cut out, and the wings popped up in the same way as the one on yesterday's card.
The background was stamped using a flourish stamp and lilac ink - stamped off once first to make it paler. I drew the butterfly trail lightly in pencil, then added the black dots before erasing the pencil line.
Finished off with a strip of lilac card, stripy Doodlebug paper punched with a Martha Stewart punch, and a gorgeous sheer lilac ribbon with swirls printed on it.
Sadly, I did a bad job with my photography on the cards from this class, and I no longer have them as they have been left behind in the shop on display. This card is much fresher and prettier looking than the photo shows!

This is one of the cards the ladies made at my class at the Glitter Pot on Wednesday. It uses Hero Arts stamps and My Mind's Eye Beloved papers. The flower image is stamped onto white card, and the leaves painted using a watercolour marker scribbled onto a tile, and then a water brush to pick up the colour. The stamped image includes the frame, and after painting the whole thing was cut out using scissors, and trimming around the leaves and flowers where they project beyond the frame. The flowers are paper pieced using the same designer paper as the backing for the card. The larger flower was cut out twice so that it could be layered - had a little bit of shaping as well with an embossing tool.
The butterfly is also paper pieced - the hearts on the inner wings are the reverse of the yellow polka dot paper. His body and antennae were inked up using a black marker, and stamped on the background before sticking on the cut out image with the wings popped up. See here for how I like to pop up my butterfly wings.
Finished off with some doodling around the edges, a punched lace strip, some stripy sheer ribbon, and three little punched hearts with clear gem centres. Click on the image to enlarge for more detail.

Ink: Close to Cocoa, Old Olive, Pretty in Pink, Versamark, Apricot Appeal
Stamps: Bella Toile, Sanded
Other: Clear Embossing Powder, Pearls from Pretties Kit, 5/8 " Very Vanilla Grosgrain Ribbon
Card Size: 15cm x 21cm (approx 6" x 8.25")
Click on the image for a closer look.
I thought perhaps I would be forgiven for the long absence in posting, if I showed you a card with lots of flowers on! It was my mum's 75th Birthday last weekend, and this is the card I made for her. So behind that I was sticking in the insert five minutes before she walked in the front door . .. and it only had half a box to go home in because I messed up the measurements and didn't allow for the extra height of the main flower!
The paper I used for the main flower was some peachy/yellow scraps which I sponged with Pretty in Pink ink. Having done that, the colour almost exactly matches the Apricot Appeal card, which was a happy accident! I used the SU Scalloped Circle punch, and punched out a few circles which I then cut into 3 and 4 scallop segments. These were shaped and stuck onto an EK success six petal flower to make a few layers. I can't remember exactly now, but I think there were about five, plus three extra petals in the centre to finish. I used the same six petal flower punch to make the burgundy flowers, with little Woodware snowflakes for the centres. The tiny flowers are from a Woodware multi flower punch, punched from Very Vanilla and shaped and stuck to narrow strips of Old Olive in groups of three. The centres were simply coloured in with an Apricot Appeal marker. The leaves are a fern punch from Leone Em, and a leaf die from Sissix. Cut from Certainly Celery, and Old Olive and then shaped and sponged to give some character. Couple of little Woodware butterflies in the burgundy paper to finish off.
The Very Vanilla background has been stamped with the Bella Toile background stamp, and heat embossed with clear powder. The Old Olive layer has been stamped with Versamark and the Sanded background. No heat embossing though - I just wanted something subtle to take the plainness off the card.
Here's a close-up (click to enlarge) where you can see more detail of the Bella Toile and Sanded stamping.


The second card uses the same flower, but in a creamy pearlised paper for a different look, and has some maple leaf ivy with some simple little flowers to build up more of an arrangement.
I promised Candy yesterday, but my day hasn't gone as planned, so here I am at 11:30pm - typing on my laptop and keeping a coughing child company whilst she goes back to sleep. I'm hoping to get the candy photographed and put up tomorrow. Sorry about that!

Card/Paper: Barely Banana, Lovely Lilac, Certainly Celery, Whisper White plain & textured
Ink: Lovely Lilac, Barely Banana, Certainly Celery
Stamps: None - computer generated wording
Other: Pretties Kit pearls, Heat & Stick Powder, Dazzling Diamonds
Card Size: 21cm x 15cm (approx 6" x 8.25")
Keen eyed safari goers will also spot the new border punch that I've used on this card. It's so nice to have a pretty border punch that will work happily on card as well as paper! I punched the edge of a piece of card, and then trimmed off the punched edge to make it into a narrow strip which I snipped and curved along the edge of the white.
The top corners and the line of holes for the faux stitching were done using more new items - the mat pack and paper piercer. Even though the template has holes in straight lines, you can use it to prick along a curve as I have done here.
I used my drawing program and a font called Harrington to generate the 21 and the greeting. The mat layer on the 21 has been cut from Whisper White then glittered using Heat & Stick powder and Dazzling Diamonds glitter. I embossed the yellow numbers using a Cuttlebug folder, and sponged the edges with the matching ink. The background was quilted using my Fiskars paper trimmer and bone folder.
I've discovered that the paper piercer makes an excellent tool for scoring the line down the middle of my leaves and petals, so I've used that for these ones, along with an embossing stylus. I used three punches for the flowers - the Scalloped Circle, Five Petal Flower, and Boho Blossoms Punches.


I had a lovely day teaching a floral punch class yesterday at my local craft shop. It's so nice tucked in the class room there, overlooking the fields and away from the world. Easy to ignore the rain when you're engrossed in making flowers! Thank you to all the ladies for being such a lovely group to teach.
This is the card we made in the afternoon. The large white flowers - the Christmas roses - are made using a birch leaf punch for the petals, stuck onto a five petal flower shape to give the spacing and finished with a stamen punch for the centre. Holly leaves and a maple leaf punch for the ivy had a little brown sponging round the edge for a bit more dimension. The centres of the small white and red flowers all have liquid pearls.
We had a little extra time, so made a tag to match the card.

Don't forget to hop over to Natalie's blog today for the Safari!
Phew! I've managed to be on time for my second turn at hosting the safari - although a flat camera battery did its best to thwart me. That's what you get for forgetting to turn the camera off. Really must get a spare battery! Still, it's charged up overnight, and fortunately it's not raining this morning so I could get outside for some good light.

Card/Paper: Always Artichoke, Very Vanilla
Ink: Always Artichoke, Versamark
Stamps: Bella Toile, Fresh Cuts
Other: Clear Embossing Powder, Always Artichoke 1/4" Grosgrain Ribbon, Very Vanilla 5/8" Grosgrain Ribbon
Card Size: 15cm x 10.5cm (approx 4" x 6")
My first order from the new Stampin' Up! catalogue arrived yesterday, but I have been very good, and did my preparation for the class I have today, before playing with anything! Sadly I didn't have a lot of time, so had to content myself with this very quick card for today's post. I used my lovely new Bella Toile stamp, and heat embossed it using Versamark and clear embossing powder. The Stampin' Up! powder is very fine, and perfect for the detail in a stamp like this. I didn't want to cover up the image too much, so I just added a strip of card punched with the Eyelet Border punch and some ribbon. Finished off with a sentiment from Fresh Cuts.
Off on the school run now, and then to the class I'm giving at my local craft shop.
If anyone is waiting on an email reply from me, I couldn't access my email account last night, and still can't this morning. My apologies for this - I'll sort it out when I get back late this afternoon.

Here's a little step by step for the robins on this card. You'll need:
Scraps of Chocolate Chip, Close to Cocoa, Ruby Red, and Basic Black card.
Chocolate Chip and Close to Cocoa ink.
Close to Cocoa marker.
White gel pen.
1 3/8" Circle Punch, Five Petal Flower Punch and 1/8" Circle Punch.

Punch out one 1 3/8" circle of Chocolate Chip, and one of Ruby Red. Put the red circle back in the punch as shown - so that the edge is about half way across the gap. Punch with the card in this position to give the tummy shape.

If you have trouble punching the tummy like this, then lay the Chocolate Chip circle over the red one so that the edge of it is touching the centre of the circle. Easier if you make a dot in the centre of the red circle first. Use the edge of the Chocolate Chip circle to draw a line on the Ruby Red one, and then cut out using scissors or a craft knife.

Punch out a Five Petal flower from Chocolate Chip, and another from Close to Cocoa. Mark the centre with a dot and cut into this dot from between each petal to divide them as shown. If you're only making one robin, then you can save card by only putting the card into the punch a little way - enough to get one petal of Close to Cocoa, and two of Chocolate Chip.

Sponge the edges of the Chocolate Chip pieces with Chocolate Chip ink, and the Ruby Red and Close to Cocoa pieces with Close to Cocoa ink. Use the Close to Cocoa marker to draw in a line on the beak. Punch a 1/8" circle from the Basic Black card. Alternatively draw in the eye with a black marker. Use the picture of the finished robin above to assemble the pieces. Add a white highlight to the eye with the gel pen. Once the robin is stuck to your project, draw in his legs using the Close to Cocoa marker.

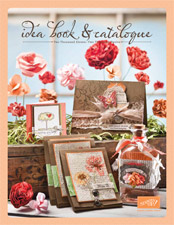
Today we're visiting the Autumn Harvest set from the new Stampin' Up! Idea Book and Catalogue. I love this set. It has a lot of potential for cards throughout the year. Christmas, masculine, pretty - it can do them all. My first card uses the pine cone stamp from the set for a kind of rustic masculine Christmas card.

Card/Paper: Close to Cocoa, Always Artichoke, Very Vanilla
Ink: Close to Cocoa, Chocolate Chip, Always Artichoke
Stamps: Autumn Harvest, Season of Joy, Sanded
Card Size: 12.5cm x 12.5cm (approx 5" x 5")
I inked the stamp using my markers in Always Artichoke and Close to Cocoa. Then I just randomly dabbed the tip of the Chocolate Chip marker over the pine cone to give a slight variation in shading. This was then stamped onto Very Vanilla. Using a sponge dauber I put a little Close to Cocoa around the edges of the vanilla card. The background is Always Artichoke card, stamped again with the pine cone around the edges in Always Artichoke ink. Matted onto Very Vanilla. The base card is Close to Cocoa stamped with the Sanded background stamp in Close to Cocoa ink, and again sponged around the edges using the dauber with Close to Cocoa.
Having stopped to look at the flowers, my second card had to include some of them! This time I used the ivy/maple leaf and dotted flower spray stamps as a background to the punched flowers, and also to frame the ribbon.


Ink: Night of Navy, Bashful Blue, Brocade Blue, Versamark
Stamps: Lovely as a Tree, En Francais, Birthday Cheer and Wishes
Other: Night of Navy 1/4" Grosgrain Ribbon, Heat & Stick Powder, Dazzling Diamonds
Card Size: 15cm x 10.5cm (approx 4" x 6")
I've never really been one for glitter, but Dazzling Diamonds and Heat & Stick have converted me. It's so twinkly! On this card I stamped the tree image, and then used the Versamark pad directly on the paper to get a good covering over the whole image. Then embossed with Heat & Stick powder, then sprinkled on the Dazzling Diamonds. You can see the sparkle a little bit better if you enlarge the image, but unfortunately, the picture can't quite capture the frosty twinkle!
I made the same card in different colours - but think that I like the blue one best.

Card/Paper: Whisper White, Always Artichoke, Bravo Burgundy
Ink: Always Artichoke, Certainly Celery, Bravo Burgundy, Versamark
Stamps: Lovely as a Tree, En Francais, Birthday Cheer and Wishes
Other: Always Artichoke 1/4" Grosgrain Ribbon, Heat & Stick Powder, Dazzling Diamonds
Card Size: 15cm x 10.5cm (approx 4" x 6")

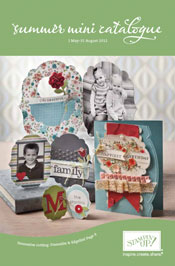
I can't believe it's the 1st October already - seems only a few weeks ago that it was the release of last year's new catalogue! But here we are, with a sparkling new catalogue again, and to celebrate the launch, a few of the SU team I am in are having a little blog safari.
We are starting off at the lovely Caz's today, and she has the link for tomorrow's visit. Each day one of us will have something made with a set from the new catalogue, and details of new products. By following the links each day, you will be led on the safari around our blogs. If you are coming to this post after the 1st, Just start with the link here to Caz's blog, and you can catch up!
Be sure and ride with us to the end of the safari!

Unfortunately I couldn't capture the twinkle of the all over glitter on the round snowflake image on this card. The large snowflake image was stamped in blue ink and then covered with heat and stick powder and fine glitter. The background was stamped with the small snowflake in Versamark on the blue Bazzill, and then the edges sponged with blue. The mat behind the snowflake image was also sponged. The punched snowflakes are finished with Stickles for more twinkle. Greeting is stamped in white Stazon. The card measures about 5 1/4" square.

I'm very pleased with the punched border design on this card, even if I do say so myself! I was just playing around with my new Martha Stewart punch and came up with this. The brocade background design in the centre is stamped using Versamark ink onto Bazzill card which gives a nice texture to the design (you can see it on the enlarged image).
I used my Woodware punches to create the flower bouquet - Christmas Flower multi punch with snowflake centres, and three different sizes of Birch Leaf punch for the leaves. The stalks are narrow strips of green card. The tag is just cut with scissors after stamping the greeting on a scrap of card. All finished off with a sheer white ribbon - never sure what it's called - organza? - and flat backed pearls on the corners. Oh, and liquid pearl centres for the flowers.

Card/Paper: Ruby Red, Old Olive, Chocolate Chip, Close to Cocoa, Basic Black, Very Vanilla
Ink: Old Olive, Ruby Red, Chocolate Chip, Close to Cocoa
Stamps: Season of Joy
Other: Gold elastic cord, White Gel Pen
Card Size: 21cm x 7.5cm (approx 8.25" x 3")
This is one of the make and take cards for my stamper's ten members this month. The robins are made using the 1 3/8" circle punch, Five Petal Flower punch, and the 1/8" circle punch. Really easy to do - and quite cute I think!


